Monday, December 17, 2012

Country Chic Dresses

So it's been a while and you could probably go buy a dress cheaper than what I spent on these, but they are pretty cheap and REALLY easy to make as long as you have some kind of sewing machine!
 

Like I said, these were SO easy! In fact, they were easier than I thought they would be. My base: a $4 long sleeve tee from Walmart. :) I then used material that I really don't need to hem as the ruffles.  Supplies below are based on one dress:
  • Long sleeve tee
  • 3/4 yard of knit fabric (for 6" ruffles)
  • 2-1/4 yards of 4" eyelet trim
  • 3 yards of 4" lace trim
So when I said they were easier than I expected, that's because the knit fabric I found at JoAnn Fabric came in like a tube!! Meaning, it was a continuous circle! I cut my 6", tucked it around the shirt and sewed away! Yay! And the beauty of knit fabric is that it doesn't need to be hemmed!
 
I think the 6" knit ruffles and 4" trims worked perfect for what I wanted. If you wanted, though, you could use wider or smaller trims for different looks, you just need to adjust the amounts you buy of each.
Okay, so I cut my knit fabric: 
 
 I then put the shirt on my daughter and decided how long I wanted the dress to be and marked where the ruffle came to. She took off the shirt and I marked all the way around where the top edge of the knit should be and drew a line to keep it straight:

See my tube?! Fantastic! 

My 3-year-old took this picture.. And many others.. of the stitching on my comforter, her feet, the floor, etc. This one I'm sharing so you can see, if I can make this on this ancient sewing machine (that's far older than me, btw) it can be done on any sewing machine.. I don't even have the little piece that comes off for sewing sleeves! 
 
For sewing, you need to use a zig zag stitch so the fabric will still stretch around arms and shoulders. To keep the ruffles fairly even - because I'm a bit of a  perfectionist - I marked the middle of the front and back of the shirt and the middle of the flat fabric tube on the front and back. I used the shirt seams and tube folds as the other two points of reference. As long as the marks lined up, I was good! I hand fed the ruffles in, meaning the shirt laid flat and I shoved folds of the tube under the presser foot. If it looked like the marks weren't going to line up, I either stretched the shirt or adjusted the folds to correct it. If you have pins, you can always pin these marks together to make it easy. I didn't have pins. I still don't have pins. Which is why the pieces keep falling off of my Advent calender. Sigh.  
 
Moving on... I sewed the eyelet trim on the same stitch line as the knit tube. The trim came already ruffled enough for me, so I didn't bother ruffling it more. I did stretch the shirt a little and once again did a zig zag stitch so it would stretch. I started in the back and when I got around to the back again, I just overlapped it a little and didn't bother sewing the two ends together. They're fine. If you have an issue with it, use a little fray stop. See? Easy.
 
For the lace trim, I sewed just above the knit tube. In fact, the presser foot ran right along the edge of the knit. Once again, zig zag stitch and stretch, shirt just slightly, and overlap in the back.
 
Ruffles are finished!
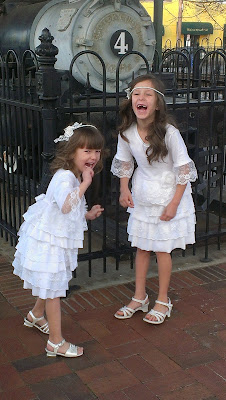
I did three tiers of three rows - if that makes any sense! Basically, knit, eyelet, lace, knit, eyelet, lace, knit, eyelet, lace. The three tiers made my younger daughter's ruffles come up higher and my older daughter's fit more like a skirt, and I actually planned it like that. I almost only did two tiers on the bigger one for that reason, but three seems to be perfect!  I finished off the ruffles by sewing this ribbon-y trim around the top to tie in the back and pinned a flower on the front.

 
Unfortunately, I didn't take pictures while I was doing the sleeves. :( They were easy, I promise! Even without that handy little trick new sewing machines have! Once again, I put the dresses on the girls and marked just above their elbows. With the dresses off, I cut off the sleeves at the mark. This I actually chose to kind of hem - the lace, not the sleeve! I wrapped the lace around the flat sleeve and left about 1/4-1/2" at each end of the lace. I sewed the two ends of the lace together so I made a little tube and then sewed the tube onto the sleeve so the lace was on the outside and the seam is toward the armpit. Just a tip, don't try to make the lace fit the sleeve, stretch the shirt to make the shirt fit the trim. It's much easier.
 
I love these little dresses! And there are so many different colored knit fabrics available, you could do these in different colors for different seasons - like browns and creams for Fall?!
 
Also, if you aren't already aware, JoAnn fabric has an app! The best part about their app is that they have coupons!! I got all of my fabric and trim at 50% off, which was fabulous!! For other craft needs, Michael's also has an app. :)
 
If you decide to make a ruffley little dress, share your pictures!
 
-ML

Friday, March 9, 2012

Super Easy Monogram Plaque

Hey! So I've been "working" on this project for about a year now. Okay, so I haven't actually been working on it. I started it about a year or so ago and forgot about it... Until now! :)

I forget where I got the idea for this, but it's really the easiest customized thing ever! Check it out:

Monogram Plaque

Again, EASY!!!

I had this frame just sitting around my house, begging to be used. I think it started as a Goodwill special. Who knows. Anyway. So I had the frame and I think I had a space to fill before I even had the idea, so when it came time to choose colors, it was basically already decided. Don't you just LERRRVE that pink and gold print??

I'm getting ahead of myself... I need to tell you what you need to make this wonderful piece of art!

Are you ready??
Are you??? :)

Okay, so you need:
- a frame - any size you want! Any style you want! YAY!
- paper - ANY design you want! Has to fill the frame. (I have a secret about mine!)
- a wooden letter that fits inside the frame.
- paint for the letter - again, ANY color/kind!
- hot glue gun
I used, like I said, a frame I had $0; wooden letter from Michael's $1.18; I ended up using two paints, one was Satin Nickel spray paint (Walmart) I had leftover from another project (the planter I'm going to stick my Christmas tree in this year!), and three coats of Martha Stewart Crafts Multi-Surface Glitter paint in Antique Silver (Michael's) $3.50? I said I have a secret about my paper. Here's the secret: I didn't use paper! I was looking all over for, like, a scrapbook paper to use. I found a few things that were okay, but they weren't great and considering I had to buy an entire book of paper to get the one paper, I wasn't getting it unless I loved it. So one day, I'm in Target getting whatever it was, when I pass by this gift bag and think, "THAT's what I want the paper to look like!" So I go over to Target's little crafty area to see if they have some paper similar while I'm thinking of it. FINALLY I realized that I could just use the darn bag! Once it's cut to size and in the frame, who's gonna know except me?! Well, now everyone, but you get my point! So, I didn't use paper, I used a gift bag!
At last, my "plaque" is complete, and in my splendid opinion, it is magnificent!
See it in my bathroom:

And another angle of the bathroom:
:)

Tuesday, February 14, 2012

Truffle Bouquets


These are SUPER easy and make great teacher gifts!! The girls in my daughter's Girl Scout troop made these for their parents with mini candy bars and chocolate hearts, that's how easy they are!

For my daughter's teachers, I upgraded to Ferrero Rocher and Lindt truffles. :)

Supplies:
  • Individually-wrapped candy
  • "Bendy" straws
  • "Wet" Floral foam
  • A container of some kind
  • Tissue paper
  • Hot glue gun
  • Scissors
  • Glue stick (Like a kids glue stick)
  • Possibly a knife to cut the foam, depending on the foam and container

Start by cutting the short end of the straws in half and bending them, and then cut your tissue paper into squares or rectangles, not too big, but big enough that when you put it behind the candy, the candy looks like the center of a flower and the paper looks like petals. I think mine were around 3x4, but none were measured and they weren't really the same size. For the ones the girls did, they used a single piece of tissue, but the ones I made for the teachers, I used two pieces of complimentary tissue glued together:
My tissue paper
Straws cut and bent

This part should be done by an adult if you're working with smaller children. Lay out 4-6 pieces of candy. Put a small glob of hot glue on each, and then stick the short end of a straw on each candy in the glue:

Next, you want to put the tissue on each candy. If you're using a single piece of tissue paper, the straw should poke through easily. If you've glued two pieces together like I did, it's not so easy. I used a knife to cut a small hole/slit in the paper where I was going to stick the straw to keep the paper from tearing:
Notice the hole isn't in the center. The long part of the straw isn't in the center of the candy, but I want the candy in the center of the paper, so adjust according to your own straws/candy.

Next, to make the paper curl around the candy and to stay in place, use the glue stick to make a circle on the tissue where the candy will go. For the Ferrero Rocher, I made the glue circle just a bit bigger than the little cupcake wrapper the candy is glued into so it would go up the sides some:

Now before the glue dries, slide a straw into the slit (or poke a hole) in the tissue paper and press the paper against the candy, trying to cover the straw:
Front
Back

Now you need to get your container ready. I used pretty Valentine gift boxes. The teacher ones I got from Walmart for around $2; the ones for the troop, I got at the dollar store! For the foam, get the "wet" foam, the squishy foam. It works better with the straws. My dollar store has some of this, and I got three big blocks for $4 at Walmart. Cut your foam to fit the container. If you have to piece some together like I did, glue the pieces together. With these boxes, I just glued the foam down in there. If you're using a vase or a cup of some kind, be sure the foam fits tightly or it will dump easily:

Now start arranging!


I think I used about 17 candies per bouquet for my 6"x6" boxes. Stick the straws in however you like! Fill in with some larger squares of tissue, and you're done!